Configure VS Code to coding in C#:
For this course, you will need to download the following tools:
- Visual Studio Code;
- .NET Core SDK x64;
-
Install the C# extensionon VS Code it self;
-
Create folder and the project in CMD;
- Git (optional); and
- GitHub Desktop Windows 64-bits or Linux 64-bit (optional).
-
A Virtual Machine: VirtualBox or VMware Workstation Pro (optional)
Required 1 - 4
Installing VSCode (Visual Studio Code)
Visual Studio Code is a free code editor developed by Microsoft. It is available for Windows, Linux and macOS.
- To install Visual Studio Code, download the installer for your operating system and run it. The installation process is simple and straightforward.
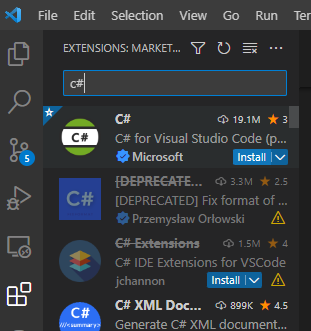
C# extension
- To verify that the installation was successful, open Visual Studio Code and click on the Extensions icon in the left sidebar. You should see a list of extensions.
-
To install C# extensions, click on the View menu and select
Extensions. In the search box, type c# and press Enter. You should
see a list of extensions. Select the C# extension and click on the
Install button.
Installing .NET Core SDK x64
.NET Core SDK x64 is a free and open-source, managed computer software framework for Windows, Linux, and macOS operating systems. It is a cross-platform successor to .NET Framework.
- To install .NET Core SDK x64, download the installer for your operating system and run it. The installation process is simple and straightforward.
Create folder and the project in CMD
-
To create a folder, open the command prompt and type the following command:
mkdir csharp -
To enter in folder, type the following command:
cd csharp -
To able run project, create a new console
dotnet new console -o NomeDoSeuProjeto -
To open the folder on cmd, type the following command:
code . -
To run the project, type the following command:
dotnet run